a favourite pasta dish with courgettes

Courgettes - I never have a glut, in fact I rather envy those that do!!! This year I grew 2 plants in the greenhouse in big tubs - for an early crop and 2 plants in an old water tank in the garden - hit and miss crop - rain and slugs! But good nonetheless. I like the ridgy Italian variety Romanesco, I think they have a lovely flavour. There are tonnes of courgette recipes I love and in the summer when they are plentiful I make big batches of Greek briam (a vegetable stew of courgettes, aubergines, peppers, onions, garlic and oregano and a few tomatoes liberally coated with olive oil and roasted in a covered dish). Sicilian caponata - not strictly a courgette dish should really be aubergines but I use both slowly cooked down with celery , red onions, capers , olives red wine vinegar and a little sugar. Fritters and bhajis made with grated courgettes also feature heavily. However this spaghetti dish is one of my favourites and a riff on it gets rolled out throughout the summer . It is a well behaved dish that can be messed about with depending on what you have in the fridge or the garden! The only proviso is don’t be mean with the olive oil, you want a nice slickly coating sauce like you would get in Italy. Below is the ‘not’ recipe, just a note on how I make it!

IMG_9089.JPG

Depending on how many people you are serving, thinly slice some courgettes (a generous amount as they will wilt down loads) - in my pic I think I was bored of rounds so I had done long thin batons, but no matter , rounds are easier!! Liberally slosh some extra virgin olive oil (at least a couple of tbs) in a large frying pan that can go in the oven. Add the courgettes a good pic of seasalt , a couple of sliced garlic cloves some chopped red chilli - or red chilli flakes, and a couple of anchovies (optional and you can’t actually tell there are anchovies in it they just add a depth of flavour) toss over a medium heat to get them cooking - I then put my pan in the oven with a lid on (this is because I cook on an everhot - bit like an aga), feel free to cook slowly on the hob. When they are starting to get soft and mushy add a handful or two of cherry tomatoes cut in half (good for using up any in the greenhouse that have split or are going over, you do really want fresh and ripe tomatoes here not tinned ones) add some capers and chopped olives - fridge clearance (again optional) ! Stir it all together and leave over a low heat or in the oven to blip away .

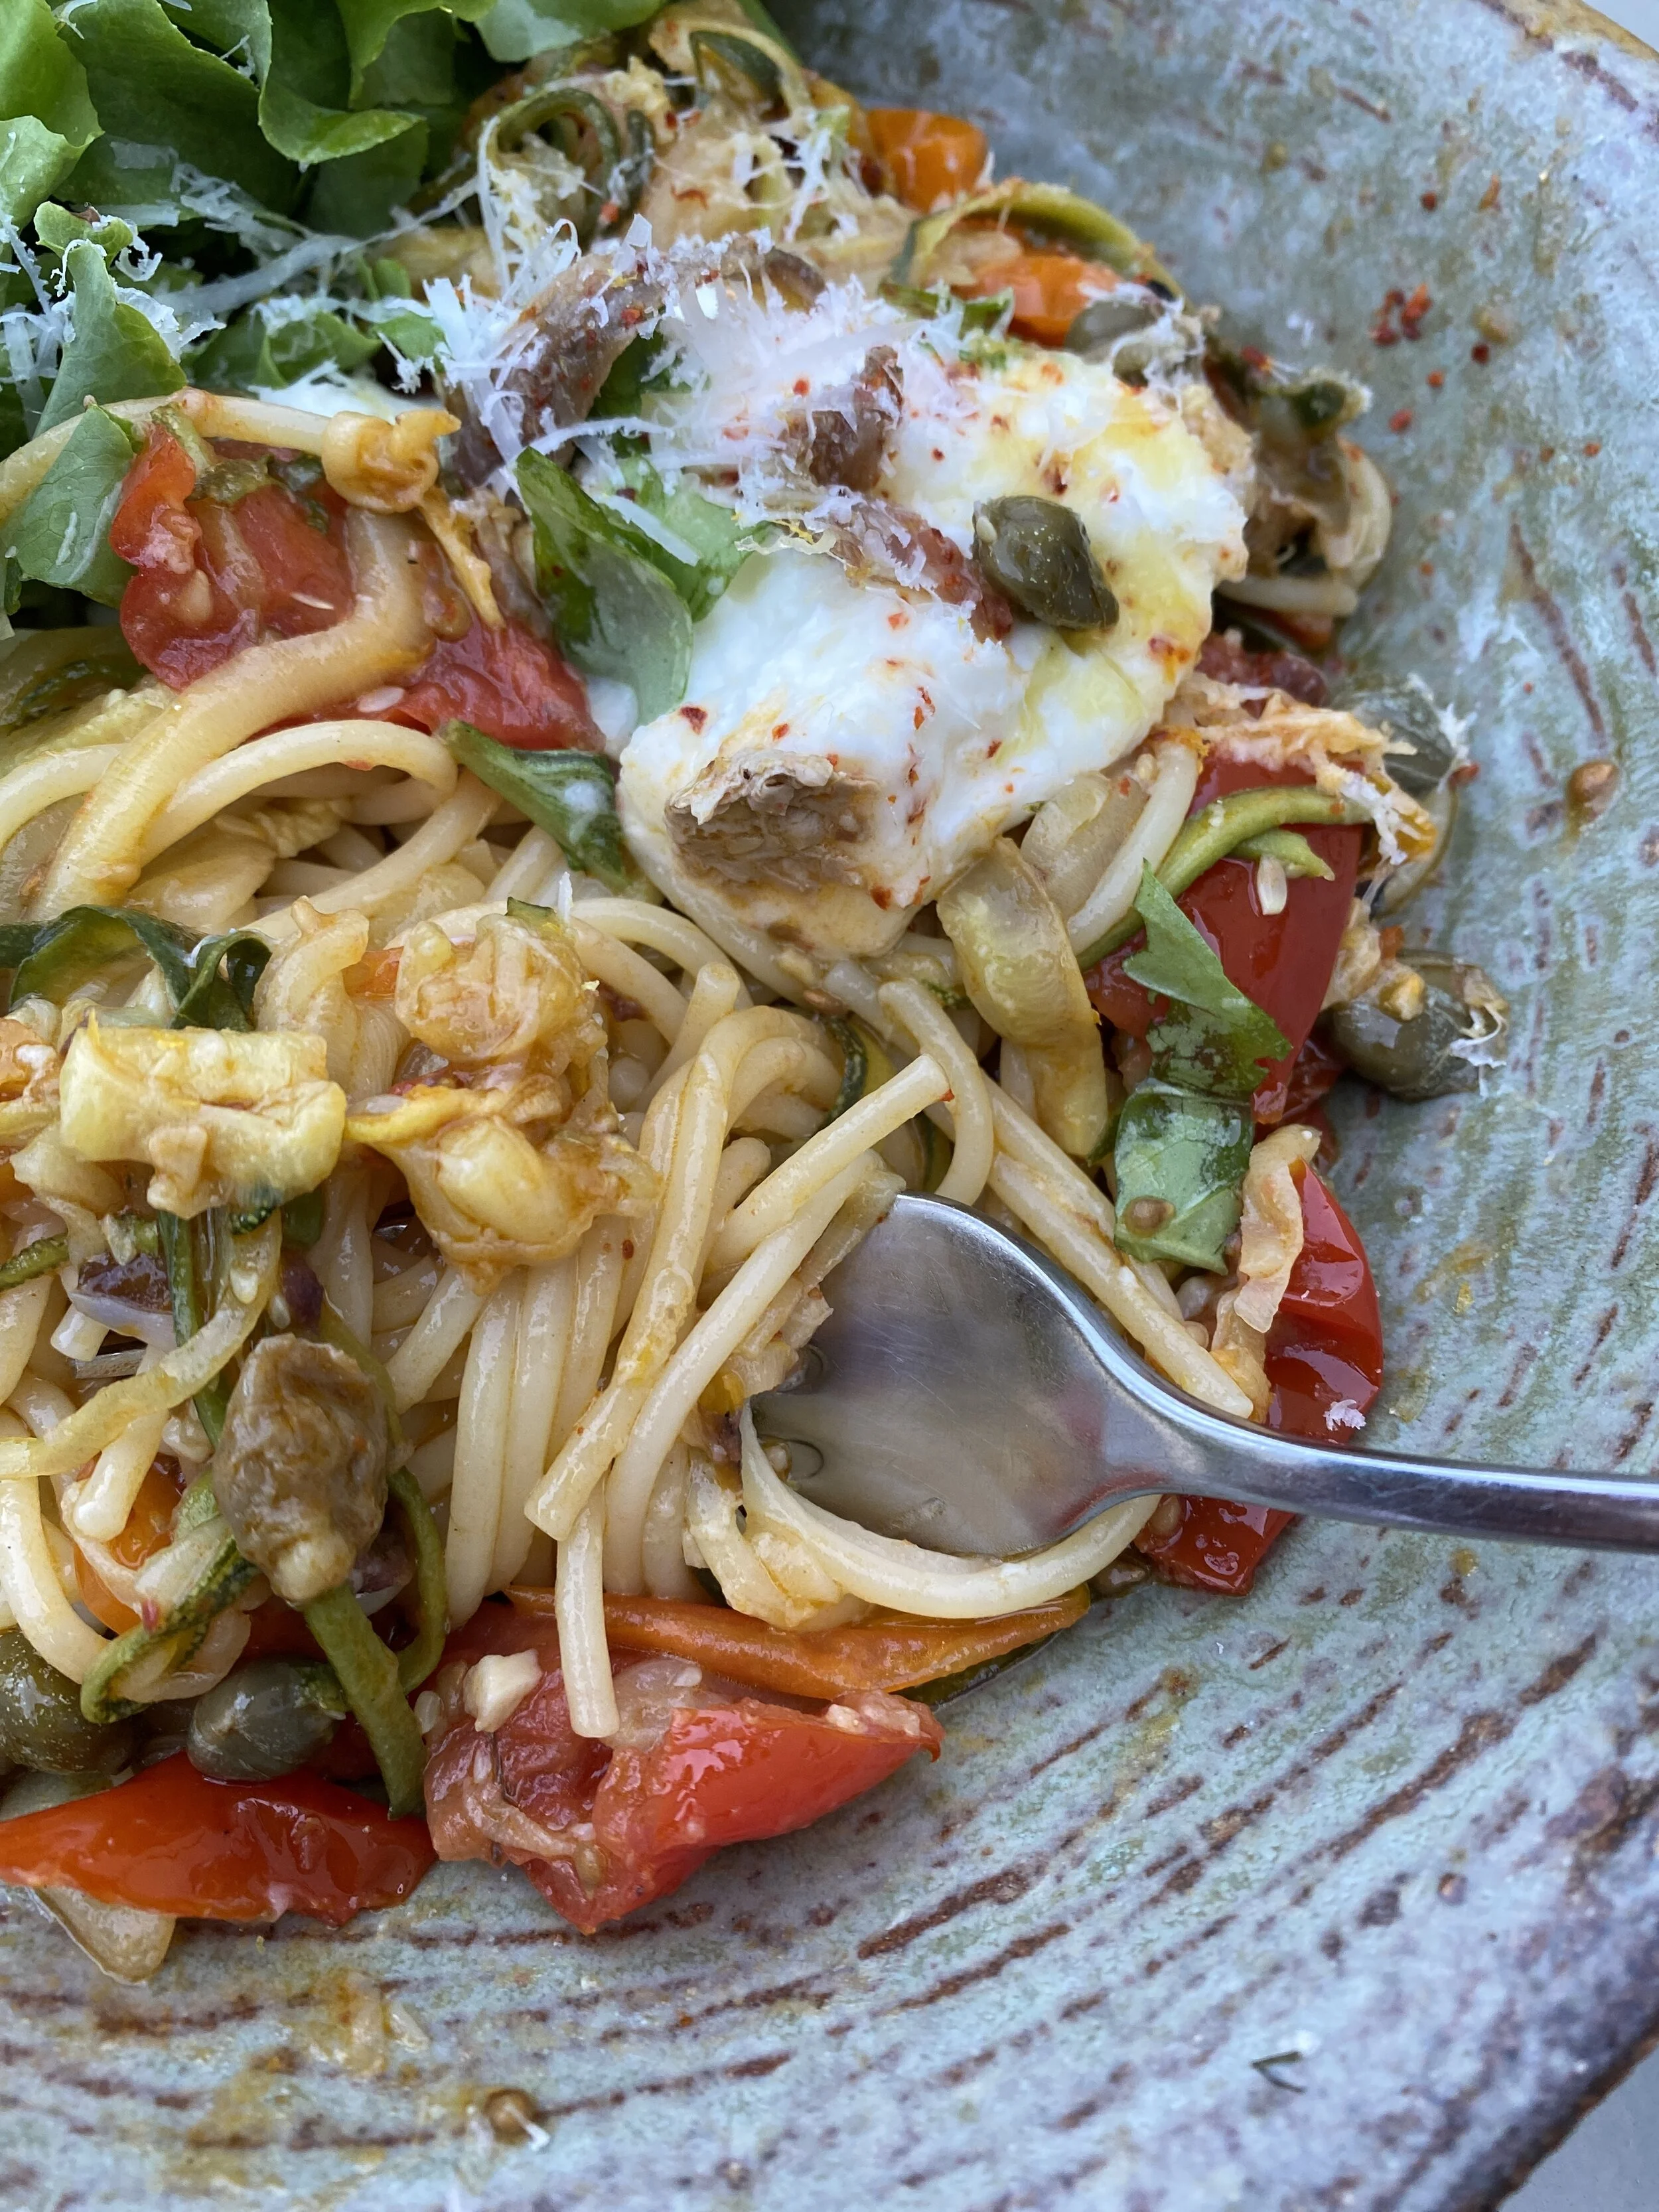
Cook some spaghetti in plenty of well salted water (or a shape of your choice but I would say spaghetti or penne are the best here). When its just cooked - you want a little bite, put the pasta pan next to the frying pan and using tongs lift the spaghetti out and straight into the sauce taking any clinging pasta water with it (you can perform the same operation with a colander but save a small cup of pasta water and add a little as needed) . Stir the pasta through the sauce (add a little spools of cooking water if it needs loosening - remember you are looking for a slick coating sauce here) and add a big handful of herbs , you could use basil, rocket leaves or parsley and adjust the seasoning. I like mine spicy so I would probably add another pinch of chilli flakes! Serve in warm pasta bowls and if you fancy add a little dob of buffalo mozzarella on the top - this makes a pleasing hot cold combination but is in no way essential . Grate over some parmesan or pecorino . This also looks impressive served for a summer lunch on a big platter with a couple of torn mozzarella balls across the top and handful of rocket strewn over the platter. Serve it with some good crusty bread and a glass of wine is essential! Summer on a plate. enjoy xx

Musings on being ethical, sustainable and kind.

I mentioned in this weeks newsletter the great sadness I felt on learning our lovely Scottish weaver was closing his doors in January. It wasn’t just a professional loss of a supplier, it was a personal one too. I had worked with Angus since my days at Osborne and Little in the early 90s and consider him a friend as well as a colleague. The mill has been in his family for over 190 years and he wove fabric for many British and American fabric houses. He supported me from the very start of the business when I was buying one roll at a time from him and we developed our lovely 100% linen base cloth together - I am sure he rolled his eyes volubly every time he received a bundle of bits of old French linen sheets with a note saying “more like this”.

collage linen .jpg

I have looked at numerous options for our print basecloths going forward, and have come to the conclusion that from an ethical, sustainable and practical point of view I want our production to remain in the UK.

Having worked with manufacturers all over the world during my career I wanted to ensure we are always working with manufacturers who share our beliefs and ethos. I want to work with manufacturers who pay their staff a proper living wage , who are striving to be sustainable, investing in people, technology and production methods and who operate ethically and fairly.

With all this in mind we are happy to report that we have placed our basecloths with 2 Lancashire based weavers. Keeping production in Britain will inevitably mean a price rise * which is always difficult and is always something I wrestle with, but I could not in all conscience move production to the Far East to save a few pounds at the expense of my core beliefs. It has been really super to work directly with the sixth generation mill owner to try and create a new basecloth, he has been really informative and transparent about costs and production routes, so I feel I have learned a lot in the past 2 months too - we should never stop learning !!! I am also happy that both mills are family businesses. It is very important for me to be working with people who really care about what they are doing and invest in building good relationships with their customers. Theres a reason I have stayed with the same printer for the last 15 years!

This leads me on to brexit! Sadly it has happened. I know many people voted leave with the thought that it wouldnt affect them “ we buy from British suppliers” they cried. However the fact remains that Britain is not a supplier of the raw materials for most fabrics! You will not have seen fields of flax or cotton wafting in the breeze as you motor up the M6! It has to come from somewhere, and post brexit that means many an import headache for British fabric companies.

Its not all doom and gloom though! We are still able to import some lovely plain tumbled linen from Belgium - albeit it at a bit higher price and we will be looking to add to expand our woven collections as our relationship with the new weavers builds, so its an exciting time for positive steps.

Happy weekend everybody

*I mentioned the dreaded price rise, this will come in to effect in the middle of march but we will have some flexibility for our customers who are mid project with us , please let us know if you need some flexibility as soon as you are able.


bright citrus

You can’t deny it, January and February are pretty joyless months. Steely grey skies, nose tingling cold and not much culinary love in the seasonal British kitchen. Its not all dismal however, it is the season for citrus. after the excesses of Christmas one of the things I do enjoy about the early months of the year is cooking with bright zippy citrus fruits. In the days of travel (remember that!!) when we used to drive to Bardonecchia for skiing I would load the car up with 3 kg sacks of blood oranges and big lemons with leaves on them.

We are lucky to have a new grocers open recently in Stroud (4 seasons market for those readers who are local) and when I was in there the other day I noticed they were selling lovely big paper bags of blood oranges and seville oranges, along side big ruby grapefruits and wooden boxes filled with leafy lemons. It made my heart sing and now my fruit bowl is over flowing with citrus.

2021-02-14 11.45.56.jpg
2021-02-14 11.42.09.jpg

Mr H loves marmalade, and though I am a proficient jam maker I’ve always found marmalade a bit of a mystery. My friend android photographer Kirstie Young makes delicious marmalade and is very generous with her jars! However she kept saying its not at all difficult so I should give it another go. I bought myself Pam the Jam book on preserving (she of River Cottage fame) and her instructions are so utterly straightforward that i’m on my second batch already . She also gives some really good ideas for variations. - I have adapted one batch with finely chopped stem ginger in syrup which was utterly heavenly. Pam has a fab website here if you would like to read more on preserving.

IMG_7617.JPG
IMG_7618.JPG
2021-02-14 11.38.58.jpg

I followed Pam’s instructions for classic seville orange marmalade fairly much to the letter, this is what I did.

2021-02-14 12.02.16.jpg

Halve and squeeze the juice from 1 kg of seville oranges and a couple of lemons (you need to give them a good wash and remove the stalk / button at the top and scrub that bit as dirt often collects there) , collect all of the pips in a jelly bag or large square of muslin, and pull the membranes out of the fruit and add to the jelly bag) tie the bag up securely.

Using a sharp knife or scissors slice the peel into fine shreds, put it into a big bowl with 2l of water and the jelly bag of innards and pips and leave to soak for 24 hours covered with a tea towel.

2021-02-14 12.40.00.jpg

After 24 hours transfer the peel and water mixture to a preserving pan and give the bag of pips a big squeeze. you will notice that it feels quite gelatinous - this is good , its all of the pectin which wi help your marmalade to set. Discard the bag.

Cover the pan with a lid and bring to a gentle simmer for about 1 and a half to 2 hours until the peel has softened a little. The liquid will have reduced to about 2l. Sterilise your jars and put a couple of saucers in the freezer.

Sprinkle in 1.5kg of granulated sugar into the pan a third at a time, stirring each time till it has fully dissolved before adding the next third. Increase the heat to a full rolling boil. for a fresh tasting softish set you need to boil for roughly 12mins. for a firmer set boil for about 15mins. Obviously the temperature of your hob may affect this and I found a jam thermometer to be the most helpful tool - 104.5 degrees is the setting temperature for marmalade.

Remove the pan from the heat and spoon a dap onto one of your very cold saucers, push the top with your finger and a skin should have formed. If it is still runny and not set enough boil it for another few minutes, this is the bit I find the hardest and its a bit trial and error. Mine ended up being quite soft set but I quite like that. Now is the time to add your chopped up stem ginger if you are using it.

Leave the pan off the heat for about five mins which helps the peel disperse more evenly and then pour into your sterilised jars, I find a wide neck jam funnel really useful for this but you can do it with a ladle and a steady hand.

Fennel , chicory, celery and radicchio all feature heavily on my winter post christmas plate. I am going to share one of my favourite winter salads with you. It is bright, crunchy , bitter and sharp and sweet in equal measures. Its also very forgiving and you can chop and change ingredients as you wish.

IMG_7540.JPG

Finely slice half a fennel bulb and place it in a salad bowl, sprinkle with salt and about1 tbs fresh lemon juice , leave it to sit for about half an hour which will soften it slightly. Pell and finely slice a blood orange and add it to the fennel, add a big handful of shredded radicchio or sliced red chicory , if you have the inside tender stalks of a celery heart they are also a nice addition. Add a few olives, the wrinkly black ones are what a Sicilian would use but I only had some big green ones so I used those, and a quarter of a red onion very thinly sliced , season with black pepper and really good extra virigin olive oil.


You can chop and change this salad. I sometimes replace the blood orange with sliced pear and a handful of toasted hazelnuts, and I sometimes add a few slices of salty pecorino to the blood orange one or blue cheese to the pear and hazelnut version. Either way it makes a nice change from a bowl of leaves!

IMG_7621.JPG
IMG_7620.jpg

I am signing off this weekend with 2 pictures that have made me smile. I love daffodils , they bring the promise of spring and never fail to cheer. The painting on the right is by Kate Loveday and it hangs in my kitchen and always makes me smile on even the gloomiest winter day. I hope you have a lovely weekend and happy cooking!

Musings on Christmas decorations.....

My friend and awesome food writer Jenny Chandler made me chuckle this week , she posted a picture of one of the corners in her lovely Bristol Home. She can’t do minimalism! I am kind of with her on that. I love that Scandi pared down pale style, but I just cant achieve it because “stuff’ creeps in !

I would dearly love a neutral / natural pared down Christmas - but the rest of the tribe would think I had lost my marbles and a revolt would ensue! How I would love all of this pale furniture and simple decor!! I really like the idea of small living trees in galvanised buckets and rustic pots and I think this is something I will take on board and buy a couple of small trees in pots which can live in the garden for the rest of the year and be brought indoors for Christmas. If you live near Stroud theres a fabulous chap at the farmers market who sells an array of wonderful vintage tin tubs.

Untitled+design-5.jpg

To be fair I have pared it down somewhat, theres a ban on tinsel downstairs - I don’t care what they decorate their own rooms with ! - in Bellas case theres a pink plastic tree shes had since she was 3! There isn’t a coloured light in sight and I do tend to use lots of natural foliage and mercury glass.

Anyway I thought I would pull together some ideas - mainly garnered from Pinterest and the wonderful Miss Mustard seed blog (oh how I would love Marian to come and get me shipshape for Christmas - or in fact for any day!!) I hope these simple ideas will give you some inspiration for easy holiday decor that is actually achievable at home and on a budget.

Untitled+design-4.jpg

I do love a wreath, I tend to favour a natural style one. Normally at this time of year Kate of Waterlane workshops and I are to be found flailing around in the hedgerows foraging for greenery for our popular wreath making workshops here in Stroud. Sadly this year we weren’t able to do it, but we will be back next year . If you want to have a go yourself, you could buy a base from the garden centre. I noticed our local Morissons had some fir bases with a not very nice ribbon, but you could detatch the bow and then customise it with extra greenery, berries, winter herbs, pine cones and foraged finds. My top tip is to follow one direction, don’t try adding bunches of things willy nilly or it wont look like a professional job! Flow the additions round the base in the same direction - as in the 2 images on the left. If you want to keep it super simple, buy a metal star decoration and tie a bunch of greenery to it with some nice ribbon our trim, you could add an old bell, or a tiny mercury bauble.

Untitled design-6.jpg

All of the decorating ideas above are really budget friendly easy DIY ideas. Kate and I make the candle jars every year at our workshops, they are super for a cheap impactful way to decorate for a party. - I know we wont be having any parties this Christmas but I am still going to please myself by making lots of nice decorations so that I can admire them while I am having g week off work!!! These images are from Pinterest, and one proviso I would add is that I would never put greenery in with the candle as I think its a fire hazard, you could put a fake candle in with greenery (Sarah Raven has some fab ones on her website) or just use the greenery tied onto the outside of the jar. We often wrap old jam jars in music paper or old book pages with stars or hearts cut out and put a tea light inside, these look super on a mantle in a row. Big kilner jars or pickle jars look fabulous lining the driveway or path to your house. Rescue some wine bottles from the recycling - clear or pale green ones work best, tie a sprig of greenery and a small cone around the neck and push a candle in and you have an instant candelabra collection. If you have creative or amenable kids then the little paper star garlands and bunting are super easy to make , you can buy star punches from craft shops or on line and they make cutting out stars much easier! However if not just download a star template on the internet and pick up a couple of old books in a charity shop and chop multiple pages at a time into star shapes. To make a hanging garland simply set your sewing machine onto a running stitch and sew the stars across the middle with a few cm gap in between each. To make a wire wreath or garland find some fine gauge bendy wire and using 2 stars trap the wire between 2 stars and glue the stars together with the wire firmly trapped between them. To make the bunting simply cut triangles of old book pages or music paper and stitch them across some narrow cotton tape or jute string.

Untitled+design-7.jpg

I tend to keep it relatively simple with flowers over the Christmas period, I always seem to gravitate towards pale colours, so usually choose some highly scented lillies or paper whites , or a few streams of amaryllis. I really like the idea of just simple branches of greenery in big jars, a simple stem of eucalyptus, or scented pine would work beautifully with a stem of amaryllis. Growing bulbs in tank vases or old jelly moulds or tin tubs works really well too. I love the picture on the left from Miss Mustard Seed. She has used a cake stand and layered it up with old teacups with candles in and greenery and nuts, this is a really simple but effective idea for a table centrepiece or would look fabulous on a hall table in an entry way.

wrap it up.jpg

My final thoughts are on wrapping. Did you know most commercial wrapping paper can’t be recycled? This is because it has either foil or glitter on it or is plastic based. I notice that Waitrose have committed to a range of fully recyclable paper this year. However its super easy and super cheap to make presents look really special with just a roll of brown paper and some nice ribbon or butchers string. My friend Helen made me laugh when she was telling me about her wrapping paper - I think its lasted her about 17 years! she bought a roll of brown paper online without noticing the size , when it arrived she possibly could have rolled it to Bristol without a break! But a roll of brown paper is great, its totally recyclable - especially if you use paper tape too, and you can decorate it in lots of ways. I love the idea of black and white photo gift tags , you don’t need to chop up treasured photos , just print out any fun ones from your phone in black and white (I sometimes use pic frame app to put 9 together in a grid and then print them on to one sheet to save the effort of resizing things) . If you want a vintage look print them onto brown craft card or a sheet of brown paper. Tie your parcels with red and white butchers twine or some pretty ribbon. A sprig of greenery and a Christmas decoration is another lovely idea for a cost effective and pretty wrapping idea. Old book pages make pretty packaging for small gifts like jewellery boxes or soaps, and if you have the time and inclination using your sewing machine makes a really fab package; wrap your parcel leaving plenty of space at the ends , then instead of folding and taping the ends stitch them shut - you need to make sure you’ve left enough space and don’t clonk your needle down onto whatever inside the parcel. You could have some fun with this by changing the thread colour to red or bright pink and matching some ribbon to the thread colour. Depending on your sewing skills you could even stitch a simple tag in as you stitch across the edge. Remember you will need to change your needle when you go back to sewing fabric as the paper will blunt it. Finally having discovered the wonders of posca paint pens this year, I will be enlisting the kids to make ‘gingerbread house packaging using brown paper bags . Posca pens look like white paint but you can draw with them like you can a metallic pen - they are fab!!! I love the idea of using old cardboard boxes to make decorative star or heart gift tags which look like gingerbreads. I think this could keep children amused for at least 10 mins!!!

If you are decorating, cooking or wrapping for Christmas this weekend have lots of fun ! Next week my favourite home made Christmas gifts,….

Stir up Sunday

We seem to be in the middle of November in the blink of an eye. This weekend sees stir up Sunday upon us. When the children were little we used to have a lovely village fundraising event where families came together to make puddings or mincemeat in the village hall as a fundraiser for playgroup. Now they are grown-up it’s hit and miss whether we remember to do it on the right day! However, this year with all of the lockdown shenanigans I have been much more conscious of the changing seasons in everything we do, from shopping and cooking to gardening to celebrating festivals great and small, so today a little bit of gentle stirring…


Screenshot 2020-11-20 at 12.24.01.png

500g MIXED DRIED FRUIT AND PEEL

225g DARK BROWN SUGAR

110 g BREADCRUMBS

25g CHOPPED OR FLAKED ALMONDS

110g SHREDDED SUET/ VEGETARIAN SUET

50g SELF RAISING FLOUR

1tsp MIXED SPICE

1/2 CINNAMON AND A GRATE OF NUTMEG

JUICE AND ZEST HALF A LEMON

JUICE AND ZEST OF AN ORANGE

1 APPLE - GRATED

1 CARROT - GRATED

2 EGGS

75ML BRANDY

100ML STOUT

I tend to use a sort of version of Delia for my pudding, I kind of don’t know what I bother with the tradition of it as only Mr H and my dad particularly like it, but it is steeped in familial nostalgia and tradition, so it would seem wrong to not have it on Christmas Day, even if its only a teaspoonful.

So here is the recipe we make every year and it’s so easy that you could give it to your children to do this afternoon! Basically, just weigh out all of the ingredients; the dry ones in a big bowl and the wet ones in a jug.

Mix the dry ingredients well and break up the sugar and the fruit so they aren’t clumped together and pour in the wet, then make sure everyone stirs it and makes a wish.

Put the mixture into greased pudding basins and top with a double layer of greaseproof with a pleat folded in it.

Steam for about 4-6 hours (make sure you check if you need to add more water to the pot). When it is cool, replace the greaseproof with a fresh piece and a lid of foil and keep it in a dark cool place till Christmas Day.

Reheat either in the steamer or take the foil off and microwave it.

This makes 2 puddings (depending on the size of your basin) but you can spread the mixture across several basins and give them as gifts. If you can find any vintage basins even better! Top with brown paper, tied with ribbon and a sprig of greenery.

Screenshot 2020-11-22 at 09.44.28.png

This Sunday I will be making my mincemeat and I might do a cake. Only Mr H likes Christmas cake. I really don’t like sugary icing and the kids always prefer something chocolatey or panettone.

When I was thinking about Christmas cakes, I went down the inevitable Pinterest rabbit hole! So this year, I am not going to be wildly precious about a traditional cake and I might make several different things and share them with friends and family. I found an interesting recipe in an old Waitrose magazine which I like the look of, a different riff on a traditional fruit cake; fig and sherry cake decorated with marzipan, so I will definitely give that a go.

Untitled design-3.jpg

I found some lovely ideas to share with you whether you are a traditional fruit cake fan or after something a little bit different . You can link back to all of the original source via my Pinterest board here .

I love the idea of combining a simple cake ( - you could do a sticky date cake, or a chocolate cake or just a simple layered sponge) and then decorating it with a gingerbread house theme.


Screenshot 2020-11-20 at 12.13.12.png
Screenshot 2020-11-22 at 10.10.39.png
Screenshot 2020-11-20 at 12.14.12.png

If you are feeling chocolatey rather than traditional, I love the idea of making a big tiffin or biscuit cake. Make it dark and squidgy with good cocoa and excellent chocolate, or one of my favourite cakes is chocolate and stout sponge with a cream cheese frosting. If you want absolutely minimal effort and max impact, buy a nice panettone or pandoro and dust it liberally with icing sugar, decorate it with some sprigs of greenery and add Bambi or Rudolph balanced on top! - very cool!

Screenshot 2020-11-20 at 12.15.06.png
Screenshot 2020-11-20 at 12.20.01.png
Screenshot 2020-11-20 at 12.20.32.png

Whatever you happen to be being this weekend, have fun!

making the most of a few flowers

It feels very autumnal in our hillside garden this week, rain and winds have blown the leaves from the vine and the dahlias are coming to an end. I am always inspired by my good friend Vicky of Amberley Meadow. Her cutting garden is something to behold and even in the last throws there’s something to pick.

I had a hunt around my own garden this week and looked with fresh eyes to see that I could make some very pretty little arrangements with very little in the way of flowers.

Photo 23-10-2020, 17 25 38.jpg
Photo 23-10-2020, 17 21 31.jpg

Even as we edge into autumn and winter there are still things around to pick, whether they are rosehips and seed heads from the hedgerow or the last windswept flowers clinging on to life. Evergreen herbs and little sprigs of foliage add texture and scent.

I collected the last few dahlias, some jasmine foliage which is turning a lovely purple, sprigs of sage, a couple of roses sprigs of fennel, and the seed heads from some Japanese anemones and managed to make 4 little jam jar posies.

Old mustard jar, Bonne maman jam jar, pot from the charity shop and lovely posy vase .

Old mustard jar, Bonne maman jam jar, pot from the charity shop and lovely posy vase .

This lovely posy arranging bowl was a birthday gift from my friend and it is perfect for small arrangements

This lovely posy arranging bowl was a birthday gift from my friend and it is perfect for small arrangements

I am a terrible hoarder of small jars and vases and I often pick them up at the charity shop . I have used various small pots and jars here to create little jam jar posies and dotted them around the house. I often make these little arrangements to give to friends and to put on shelves and windowsills around the house. The key is to keep the stems short enough to fit easily in to the vases, the bigger the stems the more flowers and foliage you will need. Aim for a compact arrangement . If it feels like it’s getting unwieldy, take them out and chop a few cm off the bottoms. If you are struggling to make things stay in the vase then you can use some pieces of tape in a grid formation over the top of the jar and that will help to hold blooms and foliage steady.

Photo+23-10-2020%2C+17+38+30.jpg
Photo 23-10-2020, 17 39 15.jpg
Photo 23-10-2020, 17 36 09.jpg
Photo 23-10-2020, 17 37 25.jpg

Wishing you all a lovely weekend and fingers crossed for some autumn sunshine!

Autumn baking and a little painting

Autumn has always been my favourite season, however, since Mr H started work at a boarding school I don’t love it quite so much. He only has Sundays off during term time and in the autumn and winter, it doesn’t feel enough time. I do, however, love the change of seasons and the move to comforting cooking: rich stews, roasted game and autumn fruits.

I love crisp walks through the vineyard below us and the smell of wood smoke in the village. I often try to get a bit ahead for the week on a Sunday, which inevitably means a little batch cooking and some baking; maybe including my favourite autumnal cake, (see below).

IMG_7502.JPG
IMG_7471.jpg
IMG_5787.JPG

It seems this year has been a super year for pears and apples. The pear tree in my dad’s garden has been really prolific and we have had loads of slightly overripe pears to contend with. Pears always seem rather tricky to grow and some years they seem to bear fruit better than others. I’ve always hankered after an espaliered pear tree in the garden.

IMG_0666.jpg

This lovely article in Gardenista magazine is packed with information about growing pears, including a cheat sheet, how to pick and store pears and companion planting. It is accompanied by some stunning photography.

Pear blossom is utterly stunning and if you are ever in Herefordshire at blossom time seek out a Perry or cider apple orchard, the scent and sight is something to behold.

RECIPE FOR PEAR AND ALMOND CAKE .

Pear and almond cake always reminds me of those gorgeous pear frangipane tarts you get in France. This is a super easy take on that lovely recipe but as a cake. it’s delicious served with a dollop of creme fraiche as a warm pudding and equally lovely cold with a cup of tea. This is a really well-behaved cake; you can swap the pears for apricots, or halved plums and it will be equally delicious.

IMG_5554.JPG

Ingredients:

140g butter or baking marg

140g golden caster sugar

2 large eggs

110g self raising flour

30g ground almonds

1 heaped dessertspoon greek yoghurt

a couple of drops of almond extract.

a couple of pears peeled and sliced into thick slices. (about a finger thick)

Method

Beat the butter and sugar till light and fluffy and add the eggs one at a time.

Mix in the yoghurt and almond extract. Gently fold in the flour and almonds. Don’t beat it in vigorously or it will be a heavy sponge; a light hand is the key to a lovely tender sponge.

Tip the mix into an 8” loose bottom cake tin and place the pear slices on top of the mix like the spokes of a bicycle wheel.

Bake in a preheated oven 180 degrees till golden and cooked. (Every oven is different so I can’t be exact but in my Everhot, it takes about 20minutes.)

I often bring back little sachets of vanilla sugar from France and I sprinkle a little of this on when it comes out of the oven, for no other reason than the smell makes me feel like I am in the patisserie queue in France!


IMG_5793.JPG
IMG_5792.JPG

There is something particularly pleasing about the shape of pears; they are one of my favourite things to draw and also a really nice thing to draw or paint if you are just getting into art as a hobby. I wanted to practise painting with acrylics which was a medium I wasn’t really comfortable with so it was a pear that I did first.

IMG_5640.JPG

I really like mixing up my art materials too , you don’t have to be wedded to one medium for an entire picture, these pears are done with a mix of watercolour, ink, coloured pencil and finaliser pen. I do think art as a hobby is all about enjoyment and freedom.

Whatever you are up to this weekend, whether its a crispy autumnal walk or some baking or art and craft, I hope you have a lovely peaceful weekend.


Hedgerow harvest. Jams, jellies and pickles. (Part 1)

Maybe it’s the northern in me but I love a  free forage  and as a chill creeps into the early morning air  the blackberries , apples and sloes are ripe for picking. 

2017-09-11+16.13.21+HDR.jpg
Image 10-09-2020 at 17.02.jpg
2018-10-17 14.59.34.jpg

I’ve always been a bit hit and miss with jam making so I thought it was time to invest in a good book to guide me through the basics. Pam Corbin the River Cottage preserving expert has a fabulous book called “Pam the Jam” , so I have added that to my already extensive cookbook collection! 

2020-09-13 07.40.06.jpg
2020-09-13 07.41.24.jpg

It’s a great book which takes you through everything you need to know to make jams, jellies, compots, chutneys and pickles. The flavour combinations are a mix of traditional and bright sparkly contemporary. 

sweet and tangy cucumber pickle  , Pam the Jam beetroot fridge pickle , spiced apple chutney , Chris’ piccalilli

sweet and tangy cucumber pickle , Pam the Jam beetroot fridge pickle , spiced apple chutney , Chris’ piccalilli

So far I’ve made a delicious Indian spiced apple chutney  and a jewel like bramble jelly with a rich garnet hue and a very pleasing wobble! This weekend I am going to have a go at beetroot pickle and a beetroot chutney. 

In addition I’ve made a gorgeous sweet and tangy cucumber pickle from Sarah Raven’s Garden Cookbook, which works brilliantly with smoked fish. Mine is a bit luminous owing to being a bit heavy handed with the tumeric, but it tastes heavenly and brings a zing to the plate. 

2018-09-20 13.39.37.jpg
2020-09-08 13.39.05.jpg
2020-09-08+13.29.10.jpg

recipe as follows

3 large cucumbers2 onions; 50g salt; 600ml white wine vinegar or distilled white vinegar; 450g granulated sugar; 1 tablespoon mustard seeds; 1 teaspoon celery seeds; 1⁄2 teaspoon turmeric.

Peel the cucumbers and thinly slice them either by hand or by using the slicing blade in a food processor. (if they are large home grown ones like these, scoop out the seeds and peel them). Next slice the onions. Put them both into a large mixing bowl and sprinkle with salt. (I actually put mine in a colander with a plate and a weight - tin of tomatoes , on top which helps them drain )

Rinse the cucumber and onion in cold water, and drain well and pat dryish with some kitchen paper. Put all remaining ingredients into a saucepan and stir over a low heat until the sugar has dissolved. Add the cucumber and onion, bring to boil and simmer for 1 minute.

Remove from heat; lift the cucumber and onion mix into warm sterlised jars.

Return the liquid to the heat and boil rapidly for 10 mins to reduce and pour over cucumber in jars. - I forgot to do this with mine and ended up with too much liquid but no matter!!

I have also been on a quest to recreate fortnums delicious chilli-illi which is a big favourite in Christmas stockings in this house! My friend Anitas husband makes a fabulous piccalilli so I have used his recipe and added some chilli and lots of courgettes , fingers crossed its as delicious as it looks.  I will share the recipe and some step my step pics for this next week.

I had half a punnet of rather sad looking strawberries which needed using so I made a fabulous strawberry and rhubarb compote which is delicious on top of my morning porridge - it would made a heavenly crumble as well – though I had too many rather worthy crumbles as a child (I think my mother must have learned to make crumbles from my nan who in turn used a wartime rationing recipe so butter and sugar were minimal vistors to the crumbles of my childhood!!)  so I now prefer the more indulgent American crisp topping – Ina Garten is my favourite and I usually make the full topping amount and freeze half in a zip lock bag.  I’m sharing Inas crisp topping recipe below with a few tweaks of my own! Use it as you would a crumble topping.

  • 1-1/2 cups all-purpose flour (plain flour)

  • 3/4 cup granulated sugar - I use Demerara

  • 3/4 cup light brown sugar, packed

  • pinch sea salt

  • 1 cup rolled oats

  • 250g cold butter, diced

  • a handful of nuts - I like pecans - but walnuts or hazelnuts would also work

image.png

Camping Cooking

My friend Debs always laughs at me when she comes inside our tiny caravan and looks in the cupboard. Theres not a super noodle in sight! The lovely Mr H always does all of the packing for trips away in the van, and when he’s done with all the clothes, chairs, bats and balls he says “ just your kitchen to do!”

mackerel ready for the grill

mackerel ready for the grill

mackerel grilling

mackerel grilling

harrissa spiced grilled mackerel

harrissa spiced grilled mackerel

I love cooking and camping cooking is no exception. I think lots of people get freaked out about cooking on a tiny stove with not much equipment but I don’t mind at all. I have a little tiny pantry of staples which I always take with me in the caravan.

zatar - a lovely middle eastern spice blend which includes, thyme, sumac, sesame seeds and salt which is fabulous liberally sprinkled over the skin of mackerel before bbq and when mixed with a dash of olive oil and a squeeze of lemon makes a flattened out chicken breast sing on the grill.

Photo 30-08-2020, 13 57 16.jpg
Photo 30-08-2020, 13 57 57.jpg

harissa paste - a moroccan spicy chilli and garlic paste which when mixed with mayonnaise and a squeeze of lemon makes a wonderful dip for prawns (its good with all sorts of seafood or even grilled chicken) . This is also my go to dressing for if I am making crostini's with crab, a little dollop of this is delicious.

balsamic glaze - can perk up even the dullest tomato salad when splashed liberally with some olive oil and seasalt and a whisper of garlic.

a pot of basil - I know this is ridiculous, it lives in the bathroom sink (which makes the bathroom always smell of basil!!) but it is lovely to have a big pot of fresh basil to top a bowl of pasta or a tomato salad.

green beans and tomato salad with herbs

green beans and tomato salad with herbs

crab, tomato and avocado crostini with harissa mayo

crab, tomato and avocado crostini with harissa mayo

chargrilled grilled bream with zatar and seasalt

chargrilled grilled bream with zatar and seasalt

Fennel seeds, chilli flakes and extra virgin olive oil. Crushed together fennel seeds, and chilli flakes add zing to a marinade for bass or mackerel and will add a delicious layer of flavour to a bowl of hearty bean and tomato and pasta soup.

I usually always take a ziplock bag of fresh herbs from the garden as well, including thyme, rosemary, parsley and fennel, but I often forage these from the hedgerows too - just make sure you don’t pick from any popular dog walking areas!!!

choco Leibniz biscuits and marshmallows - to make the best s’mores you’ve ever tasted.

Photo 16-07-2020, 21 03 22.jpg
Photo+09-07-2020%2C+20+43+06.jpg

This year we took our little weber travel bbq with us on all of our trips and used it lots for cooking fish , meat and vegetables. I’ve learned that it is really important to buy good quality sustainable charcoal (lots of supermarket charcoal is derived from unsustainable sources adn is contributing to appalling deforestation) for the absolute best results. we buy ours from the Jolly nice farm shop who source it from a local charcoal burner. Whittle and flame also come highly recommended.

So if you have a camping trip planned this year, be a little more adventurous and pack some interesting spices to make your campfire cooking sing! my favourite places for spices are Bristol Sweetmart - an absolute treasure trove of a store well worth a visit if you are in the Bristol area. Spice mountain - online and in Borough market and Souschef online.

Staycation camping - some of our favourite hidden gems.

When the kids were small we bought a camper van, it was always breaking down but we had masses of fun in it and our trips engendered a love of camping and outdoor adventures in both children. With the kids getting older we swapped the camper van for a tiny vintage caravan and two smaller tents and we go camping every summer; usually, a big holiday to Europe and little jaunts closer to home when the time and weather allow.

The view from our camping pitch at Treloan.

The view from our camping pitch at Treloan.

Beautiful Porthcurnick beach in Cornwall

Beautiful Porthcurnick beach in Cornwall

Messing about in the river in Devon

Messing about in the river in Devon

This year seems to be the year of the staycation, so I thought I would share a few of our favourite UK campsites with you, (though they are mainly in striking distance from our home so mostly in the South West.) I am a fussy camper; there is a lot of eye-rolling when I am researching campsites! I don’t like kids clubs, entertainments, an onsite bar or massive campsites. I do like anything quirky, small campsites, clean bathrooms and proximity to a farm shop or local produce.

camping at Treloan in Cornwall

camping at Treloan in Cornwall

I do love to be beside the seaside whenever possible and this summer we headed to the Roseland Peninsula and had a week at the lovely Treloan Coastal Camping, near Portscatho. it ticked all of my boxes: an honesty box for veg grown in the polytunnel, a local fisherman selling fish twice a week, an amazing view of the sea from our pitch and the Hidden Hut within walking distance. We loved it - and in non Covid circumstances, they have a lovely area for communal campfire and cooking.

Pembrokeshire is a hidden gem, like the best of Cornwall without the people. There’s a plethora of good food, amazing beaches and stunning countryside. We like to nip off for a weekend at Trefalen Fam (no website), it’s a bit off-grid, with no electricity and solar showers so not one if you are after luxury. However, the setting is amazing, sitting above Broadhaven South beach and on the edge of the beautiful National Trust Stackpole Estate. If glamping is more your bag, then Stackpole Under The Stars looks a lovely alternative in this area. I’ve never been but it looks lovely.

Stackpole Estate and Broahaven South in Pembrokeshire

Stackpole Estate and Broahaven South in Pembrokeshire

My husband used to camp at Bolberry Farm near Hope Cove as a child in the 70’s, now it’s somewhere we go back to with our kids. You can walk to the lovely secluded beach at Hope Cove yet it is close enough to explore all the South Hams has to offer.

Camping at Incleden Farm near Saunton sands

Camping at Incleden Farm near Saunton sands

Staying in Devon, if surfing is more your bag one of our favourite spots for a weekend away is Incleden Farm in the pretty village of Georgeham near Braunton, its an easy drive to Saunton, Puttsborough or Croyde, yet off the beaten track in a village with 2 fabulous pubs! There’s a lovely deli serving fabulous coffee and wood-fired pizzas just down the road in Croyde.

Closer to home is the wonderful Thistledown Farm; a fabulous eco campsite with a marvellous cafe serving wood-fired pizzas and locally sourced food and drink. Because it is really spacious there are a limited number of pitches so it books up really quickly. It has been featured in the national press as one of the best campsites the UK.

Screenshot 2020-08-14 at 14.38.56.png
Screenshot 2020-08-14 at 14.41.03.png

It would be lovely to hear from you if you have any hidden gem campsites in the UK or abroad. Comment below or drop us a line and we will do another post with your recommendations. Wherever you end up this summer have fun!


Sand between our toes, cycling and shellfish on the beach

I get lots of emails and instagram messages asking about holiday recommendations. Just like you I always think a word of mouth recommendation is a good thing, and when I’m researching where we will go I always read blog posts and look on instagram for some real life experiences.

Photo 31-07-2020, 18 05 07.jpg

Ile de re has been one of our favourite destinations for years. One of the reasons we love it is that once we’ve arrived we can cycle everywhere and not use the car for the whole time we’re there. The other reason is it ticks all of my foodie boxes! Oyster beds surround the island, small fishing boats bob around the coast and heaps of langoustine and glistening Moules grace the fish stalls in the market.

the impressive deli in Are-en-Re market

the impressive deli in Are-en-Re market

cooking langoustine on the beach

cooking langoustine on the beach

I’m always game for trying anything and don’t believe camping cooking should feel mean or difficult, this year I got to grips with cooking langoustines on the BBQ (why would you when you can get a carrier bag full for 15e!) and we discovered the lovely little scallops you can see in the photo above, they are a little like a queenie that we would get here but you buy them in their shell like a mussel, the lovely lady on the fish stall suggested we put them on the bbq till they pop open and then drizzle them with garlic butter, they were delicious. Its a shame as a nation we brits aren’t more adventurous with our fish cooking every time I go on holiday it makes me think I must be more adventurous with fish!

Ile de Re is a fabulous place for families as theres loads to do. I like my kids to be enjoying the great outdoors on holiday , its a chance to abandon screens and connect with each other and the local community (they aren’t always in agreement on the screen abandonment!!) The island is crisscrossed with miles of cycle tracks so our day usually involves cycling to the market for provisions, stopping at the bakery, making lunch and then a cycle to the beach, an aperitif on the way home and then some fish on the grill.

The north of the island is punctuated by nature reserves, salt flats and oyster beds - you can cycle for miles past the oyster shacks and have a delicious lunch of fresh oysters, crevettes and a glass of wine for about 10 e.

Photo 31-07-2020, 17 55 35.jpg

We love Ars En Re , and thats where we tend to base ourselves. We have stayed further down the island near La Flotte and the capital St Martin,( and if you are only going for a couple of days this is where I would probably suggest.) However if you are going for longer I would go further up the island as the cycle tracks are quieter and there are slightly fewer people. As you know we are a family of campers! I have investigated most of the campsites on the island in search of a tiny magical place. There isn’t one!!!! I think the best is camping Essi , please don’t tell anyone as its my secret place! If you like lots of entertainment and kids club etc its not for you, if you like French families and clean and tidy and peaceful then its lovely! Its an easy cycle into the little town of Ars (titter ye not!!) which has the most fantastic daily market in the summer.

Photo 31-07-2020, 17 58 55.jpg
Photo 31-07-2020, 17 52 55.jpg

The beaches are sandy , and relatively quiet, because the island is buffeted by the Atlantic breezes its never baking hot, theres always a breeze. Theres waves at the north end of the island by the lighthouse, and calmer seas along the coast at Les Portes. We loved ‘doing the Mao’ as recommended by my friend Kate of Oakley Moore design. As the tide is incoming you can bob along the channel La Patache at some speed , clamber out on the beach , walk back up the same and do it all over again - lots of fun!!

Whether you have a trip planned or staycation this year enjoy your hols!

Homemade ricotta inspired by Italian travels

I think sadly I have had to say goodbye to our summer trip to Italy this year. Sad though it is to miss it this year, we will go back next year and hopefully, experience all the joy of Liguria in 2021.

One of my favourite things about our summers in Levanto is the gentle rhythm of the day. We get up, go and sit and have a coffee then cycle to the market to buy the days provisions, maybe stop for a gelato, have a long lazy lunch and then go for a late afternoon swim before an aperitivo in the square.

2018-08-13 12.36.55.jpg
2018-06-01 15.38.32.jpg
2018-08-15+12.23.06-1.jpg

When the friendly alimentari owner in the market has fresh wobbly ricottas on his counter I am unable to resist. I love it served super fresh with chestnut honey, or mix it with shredded basil and a little lemon zest and fill courgette flowers with it before deep-frying them till crisp - perfect with a glass of chilled white wine.

2018-08-11 13.23.13.jpg
2018-08-11 13.22.58.jpg

Since we aren’t going to see the friendly face of the cheese man, I have been making my own version this summer and it’s really rather good. It is not proper ricotta but it is pretty similar and it tastes great. Here’s how you do it…

You need:

1 ltr of whole milk,

1 cup of double cream

1 teaspoon sea salt.

Bring this just to boiling point then take it off the heat. Stir in 2 or 3 tablespoons of good quality white wine vinegar and then leave it to settle. You will see the milk mixture separate into curds and whey.

Allow it to sit for half an hour or so and then strain into a sieve or ricotta mould, (I annoyed everyone by bringing one back in our luggage 2 years ago) and leave it to drain.

Photo+21-03-2020%2C+13+14+05.jpg
Photo 21-03-2020, 13 13 57 (1).jpg

When it has drained turn it out and use it in your recipe. if you want to keep it for a few days, place it in a covered bowl in the fridge.

You can use it to stuff pasta, or to make a whipped ricotta dip.

Photo+22-03-2020%2C+13+00+14.jpg
2018-06-02 13.33.16.jpg

How to have some fun printing at home.

Following on from our newsletter this week I thought it might be fun to show you how you can do some printing at home with all sorts of objects you will find around the house.

potato printing

potato printing

printing with a. school eraser

printing with a. school eraser

Even though I have a big collection of wooden printing blocks some old, some new and many collected on my travels, I still do lots of printing with found objects, you can print with all sorts of things, the rubber end on a pencil, cardboard tubes, corks, potatoes (carved into shapes) and school erasers which carve really easily with a small kitchen knife.

Photo 11-06-2020, 15 22 18.jpg
Photo 11-06-2020, 08 53 47.jpg

I loved visiting Jaipur and Bagru with Habitat in the 1990s. I had the most amazing time watching the skilled artisans of the village create the most amazing block prints and resist prints and then dip dying them in indigo dye wells, and laying them out on the parched earth to bake dry in the sun. It was the days before mobile phones so I have some actual real photos but no digital record of my trip; the children find this astonishing.

As always inspiration comes from small things, and one of the most important things I took away from my trips to India was that so much can be created from so little.  You can find lots more information and inspiration for printing on my Pinterest board PRINT DAY

PINTEREST BOARD P

PINTEREST BOARD PRINT DAY

PRINTING USING THE END OF A PENCIL AND A POTATO!

PRINTING USING THE END OF A PENCIL AND A POTATO!

We made a little video in the studio of me printing with just 2 colours, using acrylic paint and a tester pot.

And here are a couple more prints, speeded up for fun so you can see how super easy it is to get creative this weekend! Happy printing and if you would like to share your results tase us on Instagram and we will show off your creations in our stories.


Clouds of elderflowers

Cycling down the lanes in Gloucestershire over the last few weeks, the air has been heavy with the scent of elderflowers. We have the Bottle Green factory in our corner of the Stroud Valleys and in days gone by the elderflowers were picked locally from the hedgerows.

I am lucky to have a couple of self-seeded elder trees in the garden so I didn’t have to go far to find a stash of lovely flowers to make delicious cordial and pressé.

Photo+28-05-2020%2C+12+57+09.jpg
Photo+05-06-2020%2C+11+17+11.jpg

ELDERFLOWER CORDIAL

I’m sharing a recipe based on Sarah Raven’s elderflower cordial recipe which I make every year from her fabulous and much-used book “Sarah Ravens Garden Cookbook”; a must-have book for anyone who grows their own. This is the recipe I go back to because it is not too sweet and is really easy.

You need:

Flowers from 15-20 elderflower heads (I tend to trim off as much stalk as possible.)

1.35kg granulate sugar

juice of 1 orange and 1 sliced orange

juice of 1 lemon and 1 sliced lemon

juice of 1 lime

30g of citric acid.

METHOD

Add 1.2L water with the sugar to a large saucepan and heat gently until the sugar dissolves.

Bring to the boil, add the flowers and remove from the heat immediately.

Add the juices, the sliced fruit and the peel of squeezed fruit to a very large bowl and pour over the syrup and flowers. Stir well, add the citric acid, stir again and cover loosely with a tea towel.

Leave it to sit for 24 hours.

Strain through a fine sieve and pour into sterilised bottles. It will keep for a couple of months in the fridge. You can also freeze it in ice cube trays.

When frozen, tip the cubes into a labelled ziplock bag and defrost as needed. (I say ‘labelled’ because I once froze egg whites in ice cube trays and thought it was elderflower cordial - it did not make a good dinner party cocktail!)

Photo 05-06-2020, 11 30 57.jpg
Photo 05-06-2020, 12 30 13.jpg

ELDERFLOWER PRESSE

I like to make fizzy elderflower, though it is a bit of a kitchen experiment and I have blown a couple of bottles when it was super fizzy and fermented, so do be careful and burp your bottles if you do this! I’ve also successfully made a rhubarb and ginger version of this presse using the same method.

You need:

8 large elderflower heads

pared zest and juice of an unwaxed lemon

465g caster sugar

2 tbs white wine vinegar or cider vinegar

METHOD

Give the freshly picked elderflower heads a shake, then inspect and remove any insects.

Put the elderflowers in a large bowl, add the lemon juice and toss with the pared zest, sugar and vinegar.

Gently pour over 3 litres tepid water and stir to dissolve the sugar.

Put in a cool dark place, loosely covered with a tea towel for 24 - 48 hours to infuse. You want the natural yeasts in the air to get in and start it fermenting, so don’t cover it with anything like clingfilm!

Strain the mixture into a jug through a sieve, then pour into either plastic bottles or flip-top bottles using the funnel. Leave a generous gap of about 5cm at the top of each bottle and seal tightly.

Leave to ferment in a cool dark place for 2 weeks, checking on it regularly and ‘burping’ the bottles if necessary, then transfer to the fridge.

Serve chilled. It will be around 1.5% ABV (alcohol by volume).

Don’t leave it hanging around too long or it will explode which is fun for kids but not so much for anyone cleaning it off the ceiling!


ELDERFLOWER VINEGAR

I’ve also tried making elderflower vinegar this year, inspired by Rosie Birkett’s book “ The Joyful Home Cook”.

You basically just fill a sterilised jar with lots of heads of elderflowers picked off their stalk and then top up with good quality white wine vinegar and leave to infuse.

Strain it into bottles and use in your regular salad dressing. Unfortunately, I haven’t tasted it yet so, I can’t tell you whether it is lovely or not!!

I hope you are inspired to have a forage in the hedgerows this weekend!!

Photo+04-05-2020%2C+19+04+46.jpg
Photo 05-06-2020, 11 26 24.jpg

Veg box cooking

It has been a funny old week, I keep getting up and putting shorts on because it looks sunny and warm, then I go outside and it is really cold and I have to search out a jumper. I lost all of my beans to a  frost on Sunday night and I can’t plant my courgettes out yet so they are gasping in the greenhouse.

Photo+09-05-2020%2C+08+32+34.jpg

In other news, I’ve had a different career hat on this week and become a greengrocer. With the Farmers Market closed for the time being, I contacted Styan family farm - one of the local suppliers at our lovely farmers market in Stroud and we have set up a village veg box. What has been so lovely is that not only are we supporting a lovely  family farm,  we are also exchanging recipe ideas and food tips.

Our village veg What’s App group has been buzzing with interesting ways with chard, recipes for colcannon and other things to do with asparagus. I’ve even delivered some of the boxes on my bike!

This week I’m going to share some recipes for beetroot, as I think it is an underused veg and one that sometimes brings back rather yucky memories of the ’70s (certainly for my husband who didn’t like it at all until lockdown started but now he’s a fan.)

As a child of the ’70s, I remember (quite fondly) those salads which constituted a couple of lettuce leaves, (the round limp variety - none of your fancy leaves then), a sliced tomato, a few slices of cucumber, maybe a spring onion or a radish out of the veg patch, a crinkle-cut beetroot in vinegar and a dollop of salad cream.  I loved this but sadly my husband did not. Coupled with getting it boiled at school he was destined to be a lifelong sceptic but now he has embraced this lovely pink-hued veg in all its glory.

lovely beetroots in this weeks veg box

lovely beetroots in this weeks veg box

beetroot growing in my veg patch

beetroot growing in my veg patch

Here are a few of my favourite recipes for doing interesting things with beetroot. Don’t forget to use the leaves, you can cook them like spinach, so don’t fling them in the compost. 

As you know I’m not the world’s most accurate cook so some of these are approximate on the measuring front. You may need to adjust depending on how many you are feeding and how spicy or seasoned you like your food.

Photo 15-05-2020, 09 43 13.jpg

BEETROOT BHAJIS

Coarsely grate a beetroot and finely slice a red onion.

Mix them in a bowl with:

1 teaspoon cumin seeds

1 teaspoon garam masala or curry powder

some chopped coriander

chilli (if you like it)

plenty of salt and pepper.

Add about 3 tablespoons of gram flour (chickpea flour - you can find it in the world food section of the supermarket or from an Indian grocery and a tablespoon of water to bind everything together. If it feels very dry and floury add another tablespoon of water. If it feels too wet add a little more gram flour but you want the veg to shine here not the batter, so you need a bigger ratio of veg to batter.  

Leave to rest.

Heat up about 4cm Sunflower oil in a pan. When it’s hot fry dessert spoons of batter till crisp.

Serve with natural yoghurt. 

BEETROOT ROSTI 

Boil a large potato for 8mins and cool.  When it’s cool enough to handle coarsely grate it into a bowl.

Coarsely grate 1 large raw beetroot into the bowl, and season with salt and pepper.

Mix well together and squish into flat patties. (It might turn your hands a bit pink.)  

Gently fry the patties in butter and olive oil on both sides.

Serve with smoked salmon or smoked mackerel and a dollop of creme fraiche mixed with horseradish. 

Photo 15-05-2020, 13 24 49.jpg
Photo 15-05-2020, 13 57 13.jpg

BEETROOT HUMMUS - a riff on a Hugh Fearnley recipe 

Toast 50g walnuts for about 5mins, and blitz with 25g stale white bread, 1 teaspoon of cumin, 1 tbs tahini, 200g cooked beetroot.

I tend to wrap the beets in foil and roast them till tender then peel them.

Add the juice of half a lemon and a crushed clove of garlic and season with salt and pepper.

Blitz to a puree, adjust the seasoning and lemon juice to your liking.

Serve with warm flatbreads. 

SPANOKOPITA - a lovely Greek wild greens and feta pie. Perfect for using up the tops of your beetroot.

Finely chop an onion and fry gently in olive oiling a large sauté pan. Add a crushed clove of garlic and a pinch of salt and pepper.  

Shred the washed leaves of a bunch of beetroot and any other greens you have to hand. I've used wild garlic leaves, rocket that’s going over in the greenhouse, spinach, nettles even shredded spring greens. You can use a mixture or just one or two.  Wilt the greens and when cooked tip into a bowl. 

Add a crumbled up block of feta cheese and a beaten egg, and mix well.

Butter a baking dish or tin and line with a sheet of filo pastry. Brush the pastry with melted butter and top with another sheet of filo. You can add another sheet if you feel it is too thin.

Pile in the filling and fold the pastry over the top to cover. You may need another buttered sheet of filo to top it depending on your dish. You need to cover the filling.

Bake in the oven till golden and crisp and allow to cool a little before serving.

Photo 15-05-2020, 10 55 05.jpg
Photo 15-05-2020, 10 55 57.jpg

CHOCOLATE BEETROOT CAKE

This is a recipe that I first saw in House & Garden magazine many moons ago. It is deliciously chocolatey and velvety.

  • 250g cooked beetroot, peeled

  • 75g plain chocolate melted 

  • 125g softened butter

  • 300g soft, light brown sugar

  • 3 large eggs

  • 225g self-raising flour, sifted with 1/4tsp salt

  • 50g cocoa powder, sifted

For the icing:

  • 150g plain chocolate (70 per cent cocoa solids), broken into small pieces

  • 142ml tub soured cream

  • 5tbsp icing sugar, sifted

  • 3tbsp crème de cassis

For the cake, grate the beetroot quite coarsely and melt the chocolate in a bowl. 

Put the butter, sugar and eggs in a mixer and beat until light and pale. Alternatively, you could use an electric whisk to do this.

Add the melted chocolate, then fold in the flour and cocoa powder.

Finally, stir in the beetroot. 

Pour the batter into a greased, 20cm cake tin and bake for 45-50 minutes. (I find it makes enough batter to go in two 8” sandwich tins).

The cake is ready when a skewer inserted into the middle comes out clean. Turn out the cake on to a wire rack and leave to cool.   

For the icing, put the chocolate, soured cream and icing sugar in a bowl and set it over a saucepan of simmering water. Allow to melt, but don't let the ingredients get too hot. Stir everything together, take off the heat and add the crème de cassis.

Stir vigorously so that you are left with a smooth, glossy mixture. Leave to cool and thicken.  

Spread the icing over the cake with a palette knife. Leave the icing to set before serving the cake with crème fraiche. I tend to put jam in the middle and a layer of the frosting then sandwich it together and cover with more frosting.

A wander around our village

One of the joys of lockdown has been our daily walk. I love this time of year, when the hedgerows are bursting to life with cow parsley, cowslips, bluebells, wild garlic and the birds are in full song.

I think it’s easy to slip into a down mood during these weird days of lockdown, but finding the joy in small things definitely helps with staying positive.

Photo 30-04-2020, 13 37 32.jpg

I do feel very blessed to live in the countryside, in a small but sprawling village made of several hamlets, roughly strung together along a Cotswold limestone ridge. We have views down steep-sided valleys, footpaths meandering through wild garlic filled woods and little ginnels that criss-cross the village.

While we’ve been wandering the lanes I’ve really noticed the little things, like honeysuckle spilling over a wall, the myriad of shades of wisteria, the lovely lines of the vineyard on the opposite side of the valley, as it slowly comes to life again and birdsong with the volume turned up. (I keep wondering if the birdsong volume is related to the decrease in traffic?)

Photo 30-04-2020, 13 38 58.jpg

Little vignettes, like those above are inspiring me daily and I am adding lots of entries to my little lockdown journal. Just sketches, notes, recipes and even the odd shopping list but it has really made me observe what’s around me in a totally different and closer way. As you can see not really anything super artistic but its nice to spend a moment doodling!

Photo 06-05-2020, 17 42 38.jpg


Making nostalgic biscuits

Fondly known as ‘Daddy biscuits’ in our house, these biscuits are filled with nostalgic memories for our family. My husband’s mother always had a tin of them on the go, on family camping holidays; a tradition all 4 siblings in his family have continued. Whenever we all go camping to the West Country you can guarantee there is a tin of these hidden away to be eaten on windswept beaches or on a walk.

Photo 04-06-2016, 14 33 00.jpg
Photo 03-06-2016, 19 26 06.jpg
2009-02-26 15.57.31.jpg
2000-01-01 00.00.32.jpg

I think they are probably some form of Anzac biscuit; they certainly have oats, coconut and syrup in them, like an Anzac biscuit. They are a bit like a thin and ‘less worthy’ flapjack.

They were one of the first things my daughter learned to cook, standing aged 3 on a stool in the kitchen with her granny. When she was learning to write, she carefully wrote out the recipe and it’s that recipe that we all still work from 12 years on. It’s a bit splattered, but aren’t all the best recipes!

These are a super easy bake for kids and can be adapted to endless variations. I sometimes put in sultanas or cranberries, or chopped dried apricots. The children if they are making them without me often scatter some chocolate chips on top as soon as they are out of the oven. We sometimes half dip them in melted chocolate for an indulgent treat.

2020-03-28 15.45.53.jpg
Photo 30-04-2020, 13 04 50.jpg

To save you trying to decipher the recipe here it is. I am afraid with it being from Granny, it's in old money measurements.

INGREDIENTS

4oz plain flour

3 oz rolled oats (not jumbo)

1 oz desiccated coconut

4oz golden caster sugar

1tsp bicarbonate of soda dissolved in 1tbs hot water

Optional: a handful of raisins, sultanas, chopped apricots, dried cranberries, choc chips.

METHOD

Mix the oats, flour and coconut together in a bowl.

Melt the butter, sugar and syrup together and then mix in the oat mixture and the bicarb and water. Thoroughly mix together, then dollop dessert spoon size blobs onto a lined baking sheet. Spread them out well as they spread quite a lot when baking. Granny and Bella would say roll into walnut-sized balls but I just usually dob dessert spoon fulls!

Bake at about 180 degrees C, till golden. Leave for a couple of minutes in the tin to cool and set a little, then transfer to a wire rack to finish cooling.

rhubarb shrub

I’ve really been enjoying following Anna Greenland’s blog and IGTV over the last month of lockdown. She makes vegetable gardening very accessible and has a very warm engaging style. I’ve been wanting to have a go at making ‘shrubs’ for a while but hadn’t quite got to grips with a good recipe.

A shrub is an old fashioned tonic, a sort of probiotic drinking vinegar. The description sounds a bit hideous I know, but I promise you it’s delicious and not really vinegary at all. Using a raw apple cider vinegar means you are getting all of that beneficial probiotic goodness.

While reading Anna’s blog, I found a recipe for rhubarb and ginger shrub and decided to give it a go. Rhubarb is just coming into its own in the veg patch and we are getting an additional bunch in our weekly veg box, so this is a great way to use up a glut.

2020-04-12 14.47.43-1.jpg
2020-04-12 12.06.38.jpg

Rather than typing out the recipe, I’m sharing with you a photo from my lockdown journal. If you subscribe to our newsletter you will have seen this is something that I started a couple of weeks ago when I joined the Slow Life Good Life Club.

I haven’t been religious about journaling every day as I am still working full time and managing homeschooling but when I’ve had the time, I’ve added a page and I’m not being precious about what goes in it. It’s purely for pleasure and may one day be something my grandchildren look at when they are studying this period in history! I will share some more pages with you over the coming weeks.